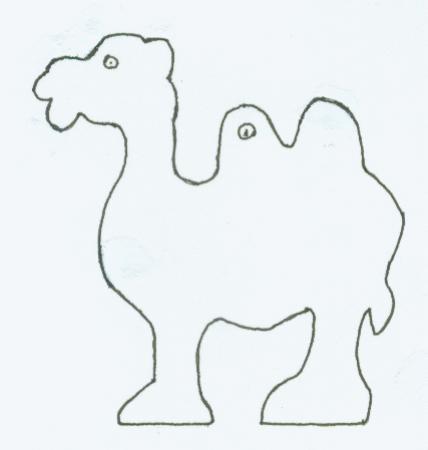
This item is just a cutout that Children paint as desired.
Tools
- Band Saw or Scroll saw
- Sanders – Belt. rotary and band
- Drill Press with 1/8″ drill bit
- Sand paper or emery boards
Material
1/8″ to ¼” plywood
Instructions
- Make pattern from print of Camel by gluing to a piece of cardboard. Cut pattern to shape. Draw shape on wood surface and locate drill center.
- To make multiples, tape 4 to 6 layers of 1/8″ to ¼” plywood together and attach pattern on top.
- Drill 1/8″ hole for hanging and for the camel’s eye and cut pattern and wood to shape using saw. Note: cutting four to six pieces at a time makes for smoother edges and speeds up production.
- On next set of parts draw around pattern on wood surface and mark hole centers.
- Sand to ease rough or sharp edges.
- Sand front and back surfaces with a belt sander to smooth to remove roughness.
- Rub your hands over the entire vehicle to make sure there are not sharp edges or points. Remove with sandpaper if any are found.